Frightfully Delicious: Crafting the Perfect Cherry Pie with a Spooky Halloween Twist!
As the days grow shorter and a chill settles in the air, our thoughts inevitably turn to all things cozy, comforting, and a little bit spooky! While pumpkin spice often takes center stage during the Halloween season, let’s not forget another vibrant, delicious classic that’s ripe for a ghoulish makeover: the humble cherry pie.
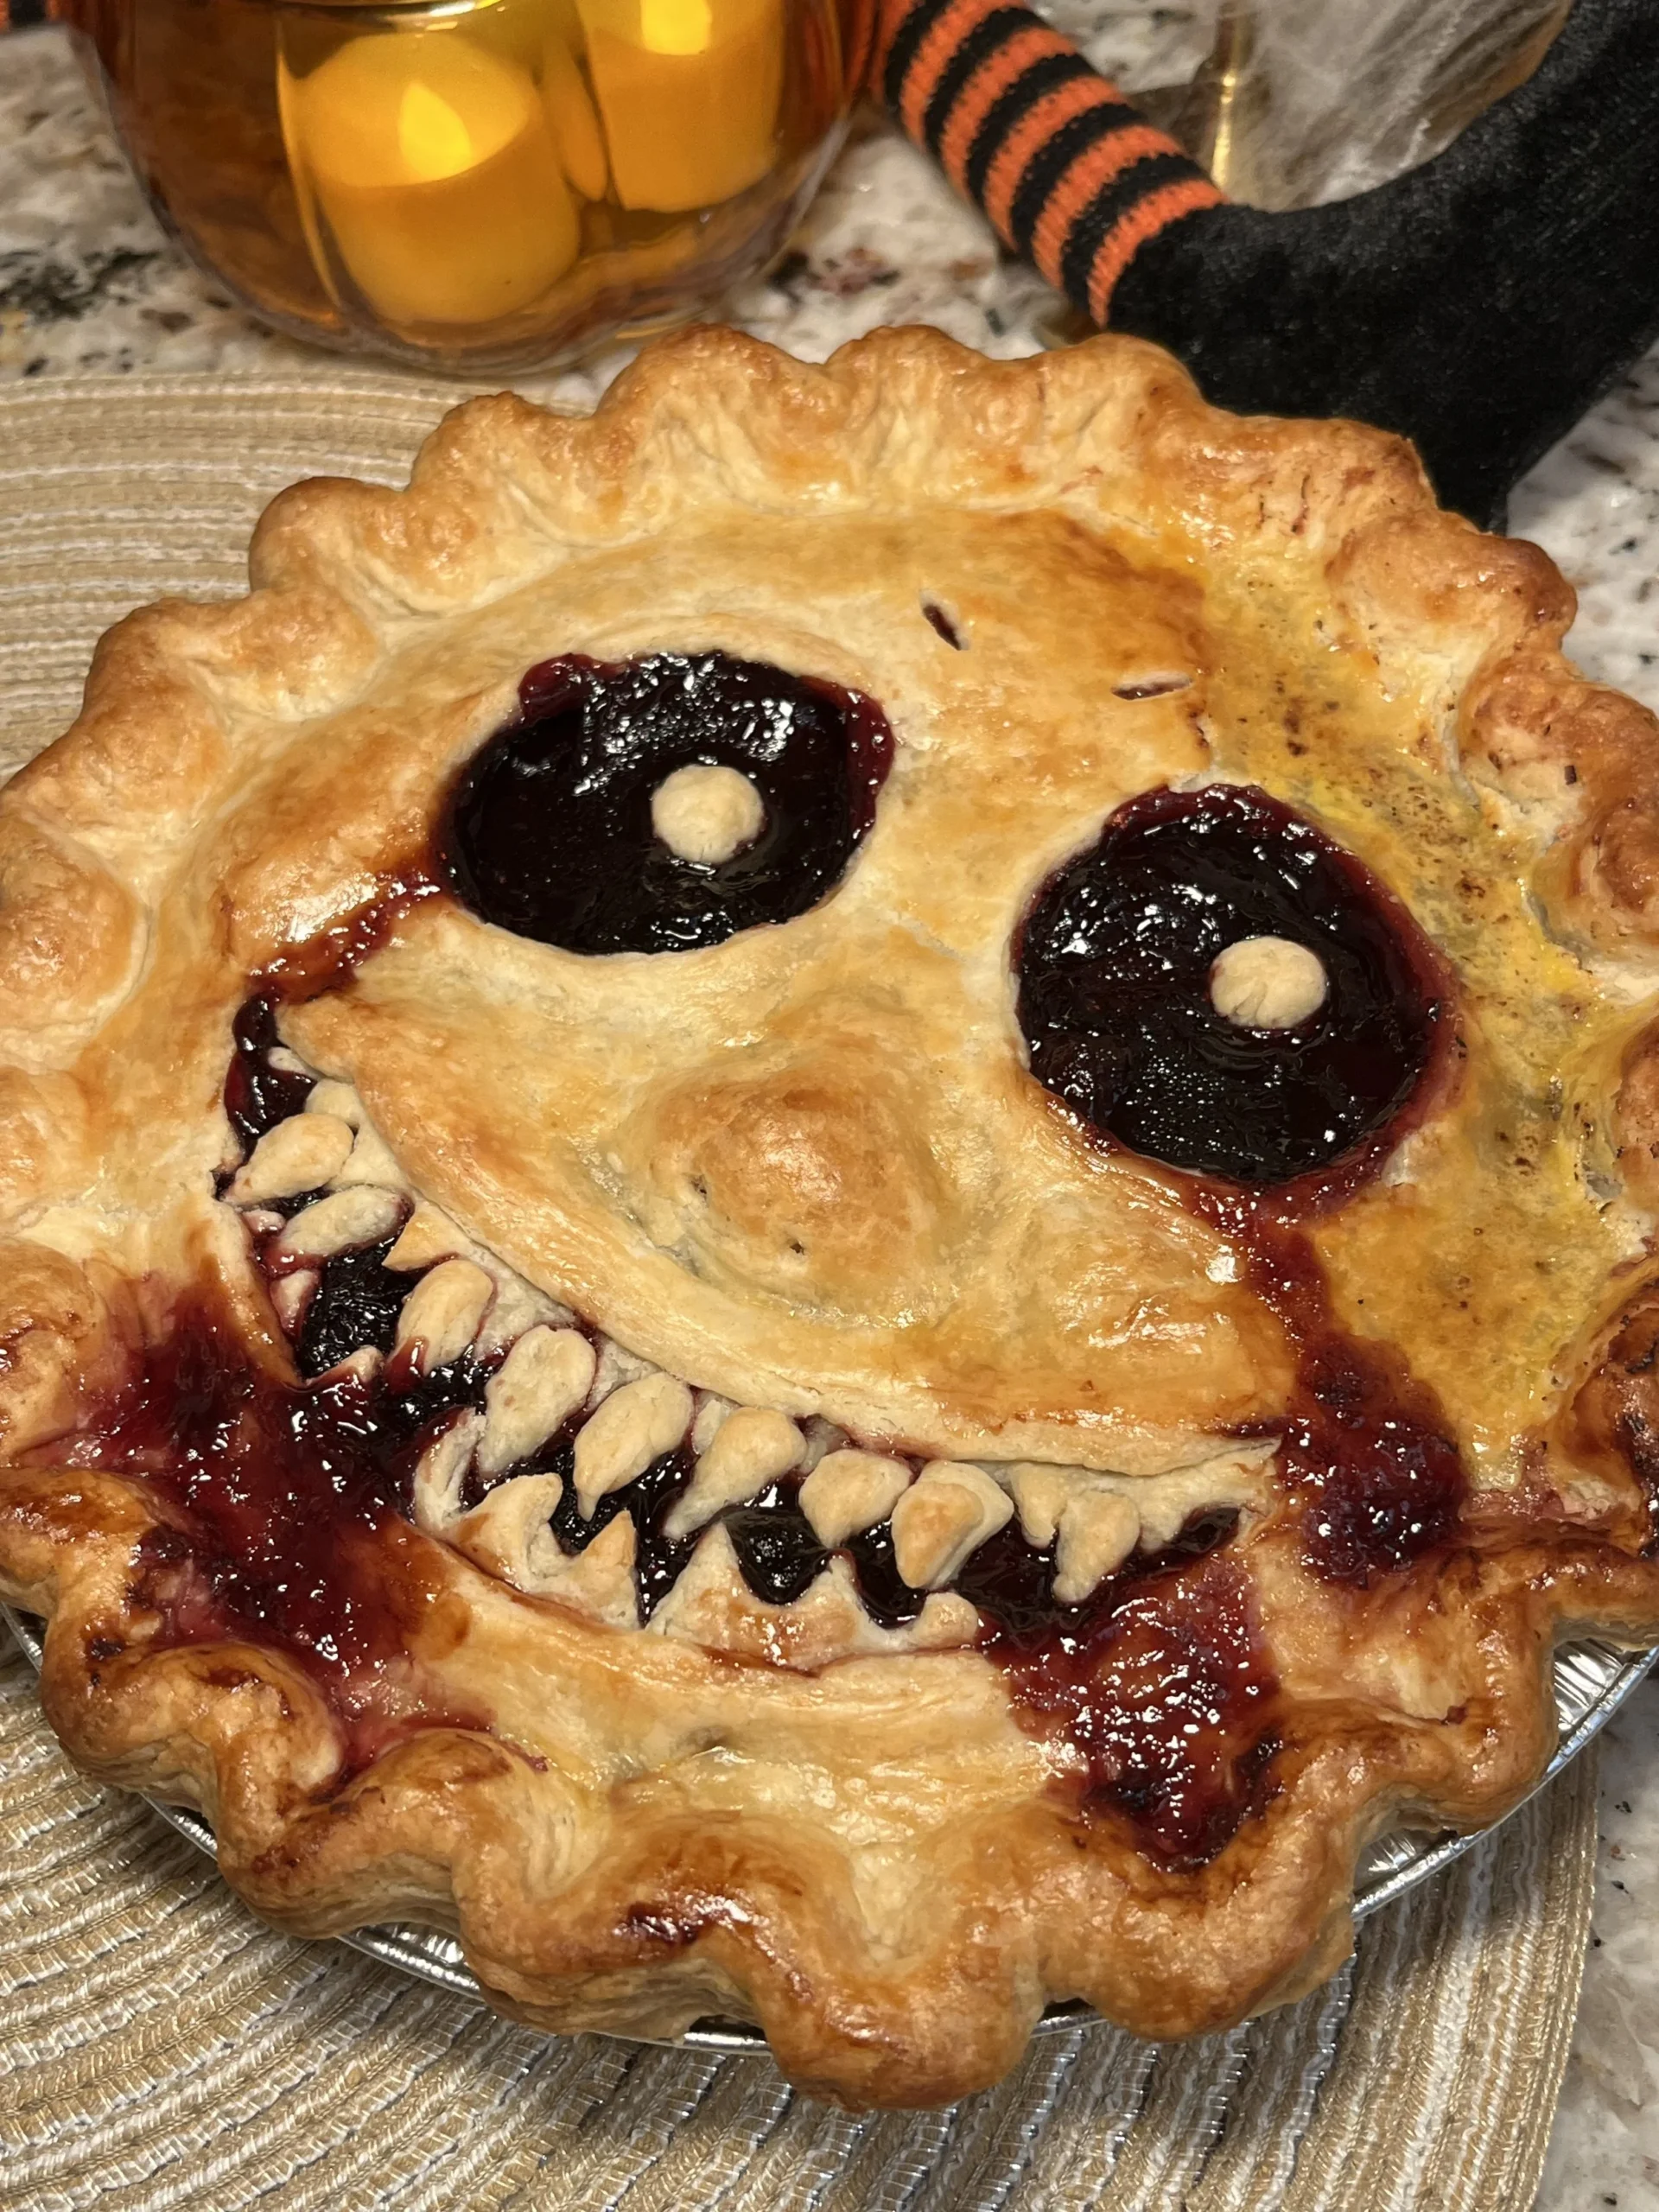
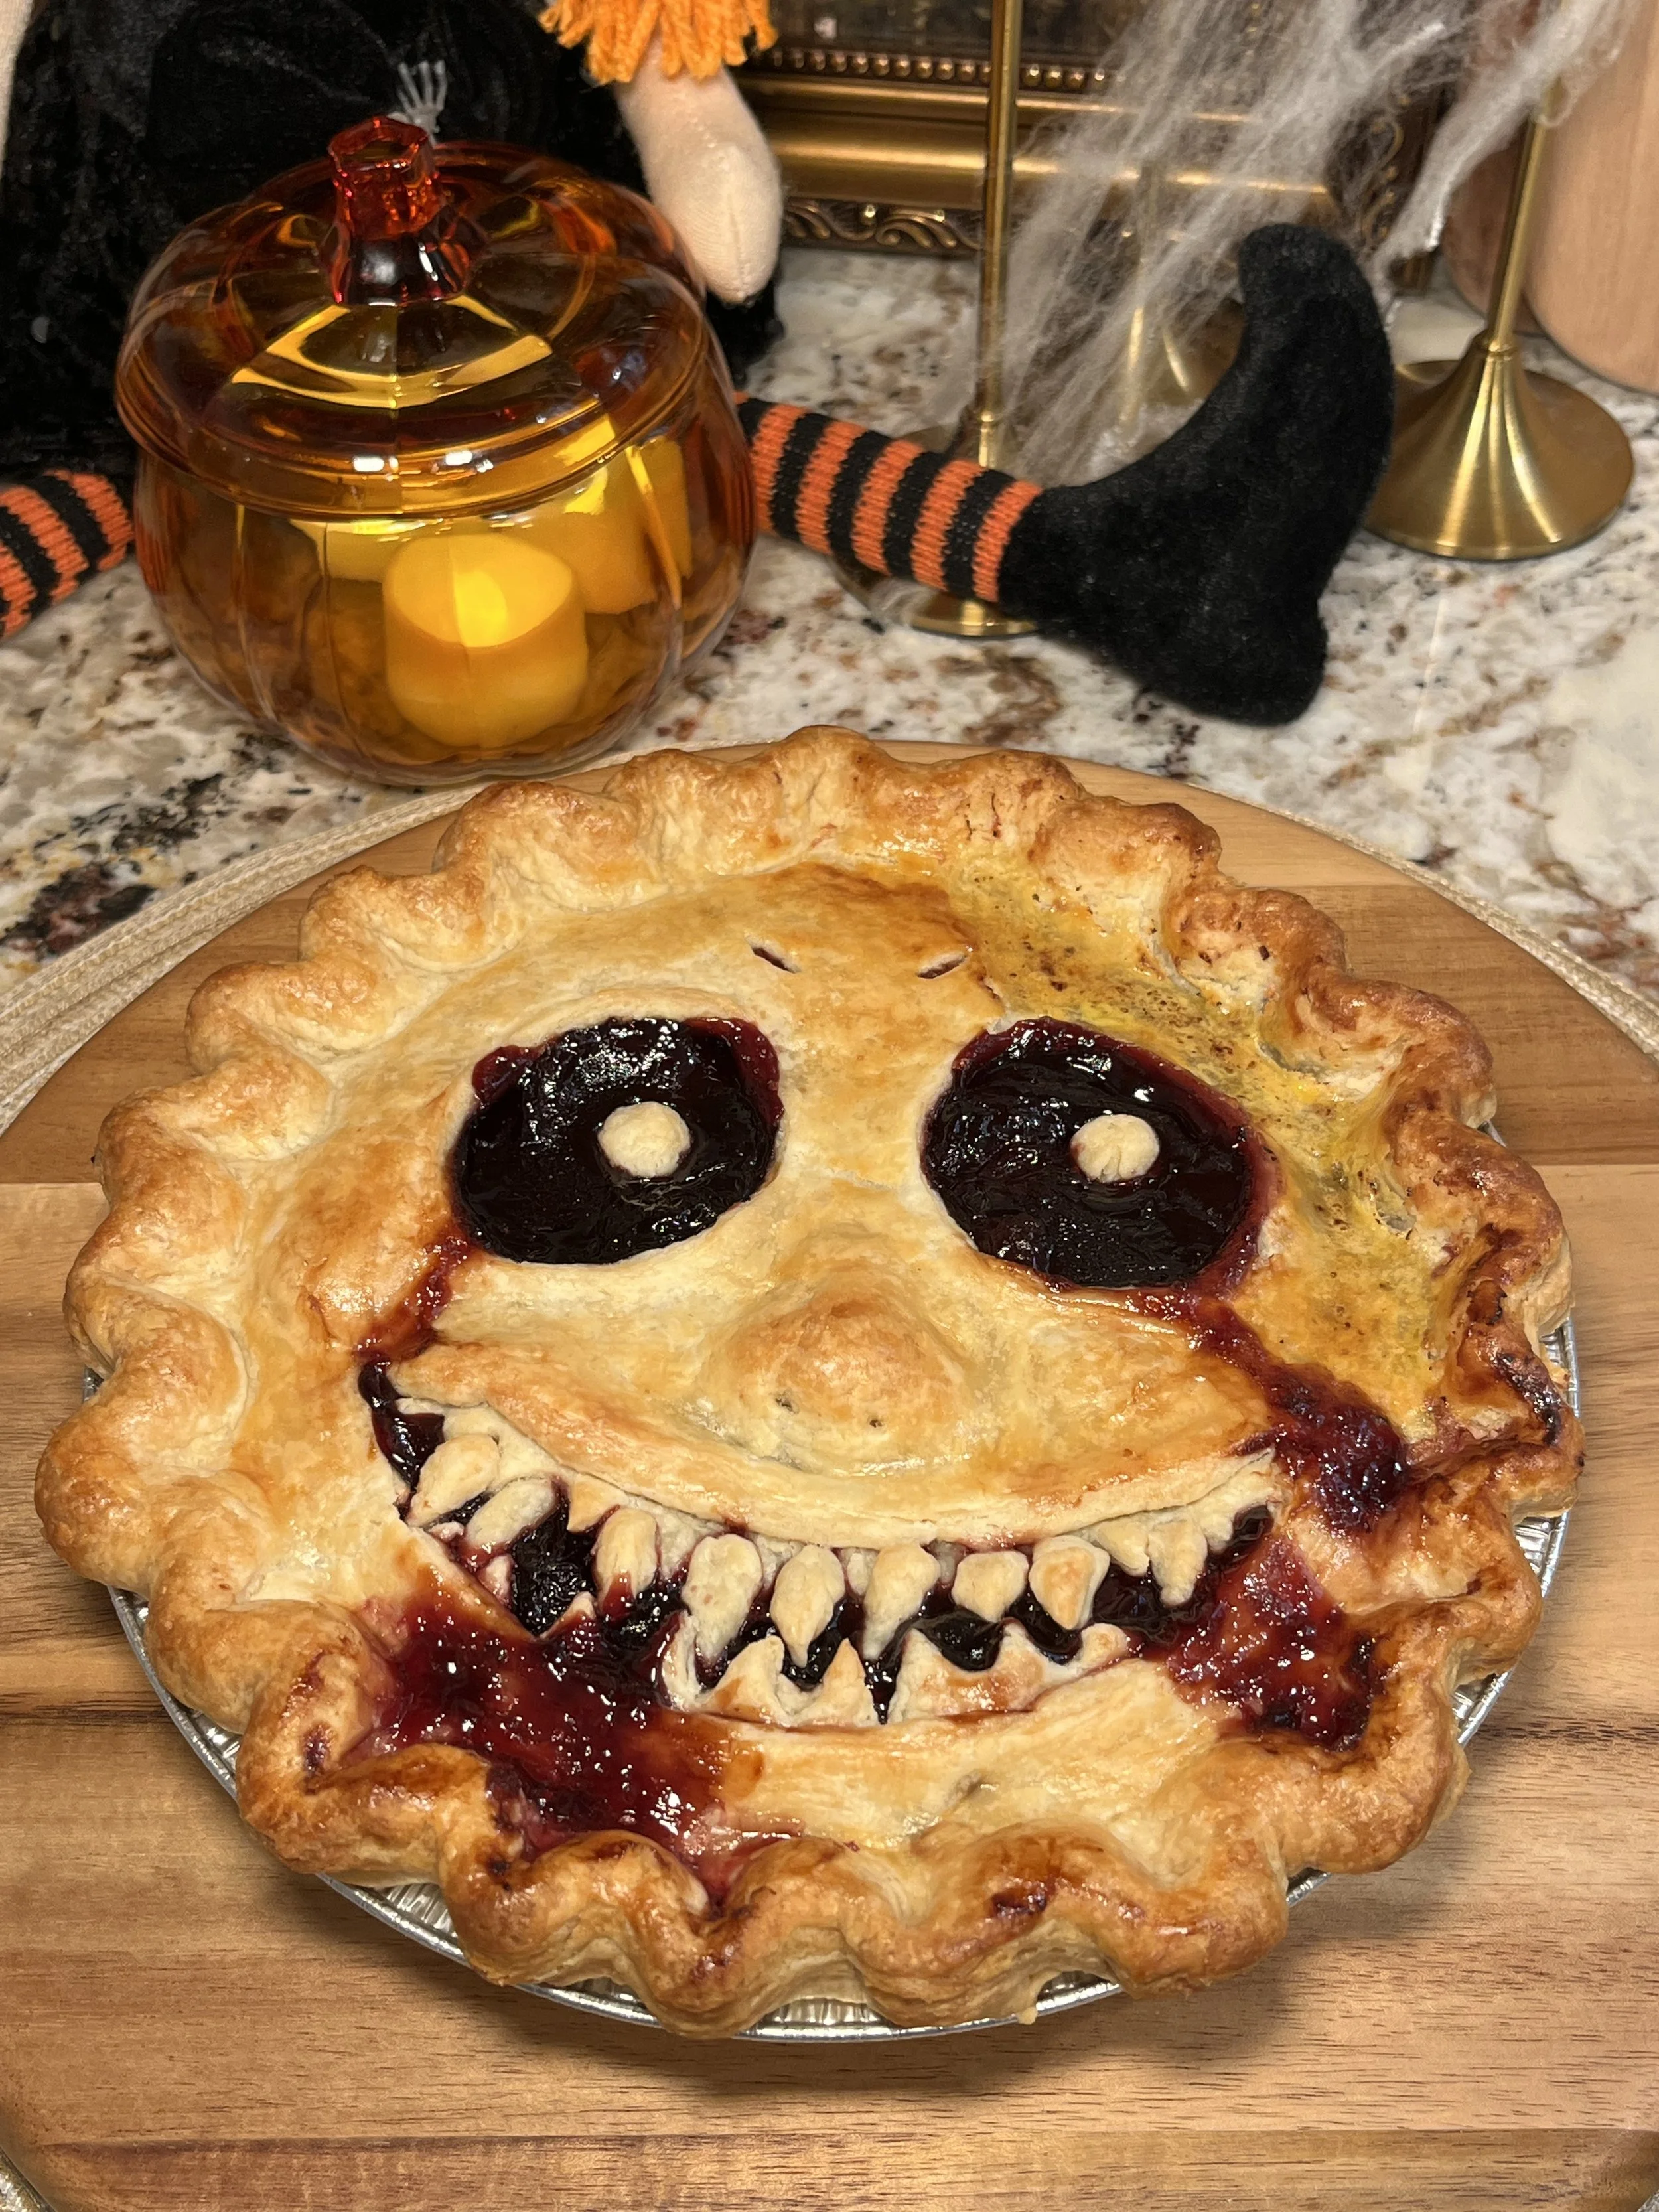
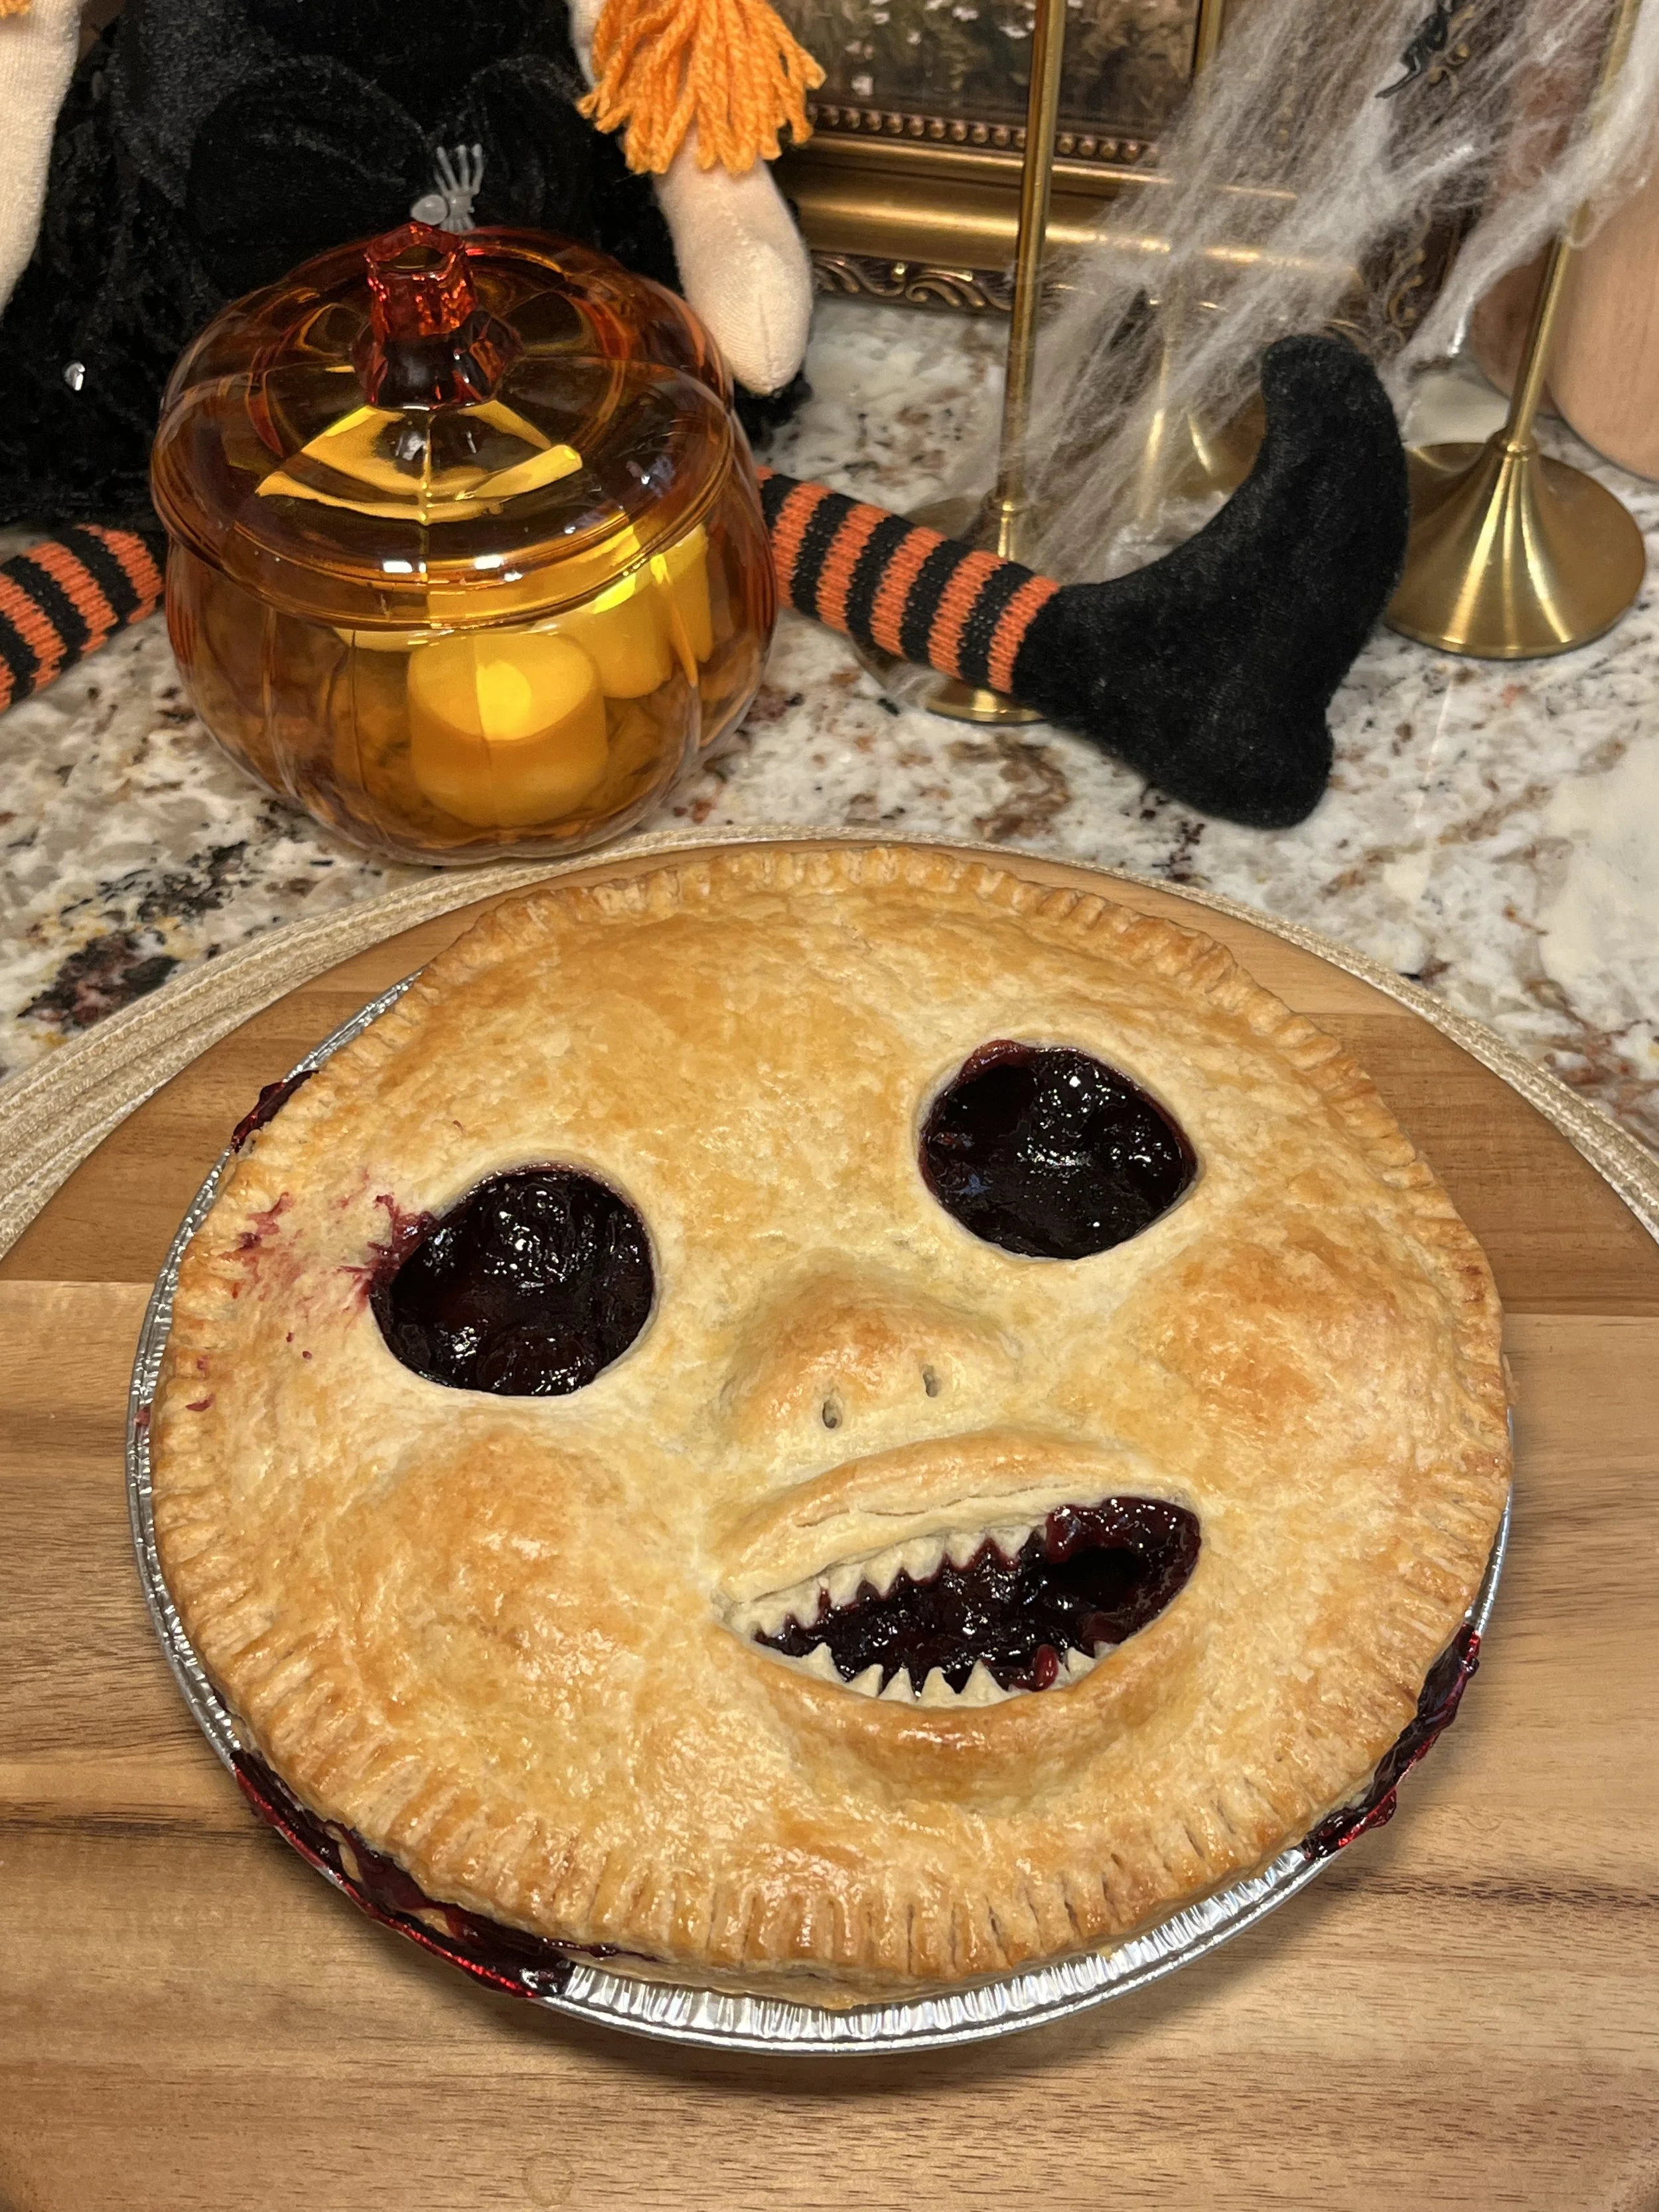
Imagine this: a bubbling, sweet-tart cherry filling encased in a perfectly flaky, golden crust. Sounds delightful, right? Now,picture that crust not just as a simple lattice or full top, but as a frighteningly fun, hand-cut scary face peering out from your dessert table! This Halloween, we’re combining the timeless allure of a homemade cherry pie with a creative, eerie design that will have your guests screaming for another slice.
Why Cherry Pie for Halloween?
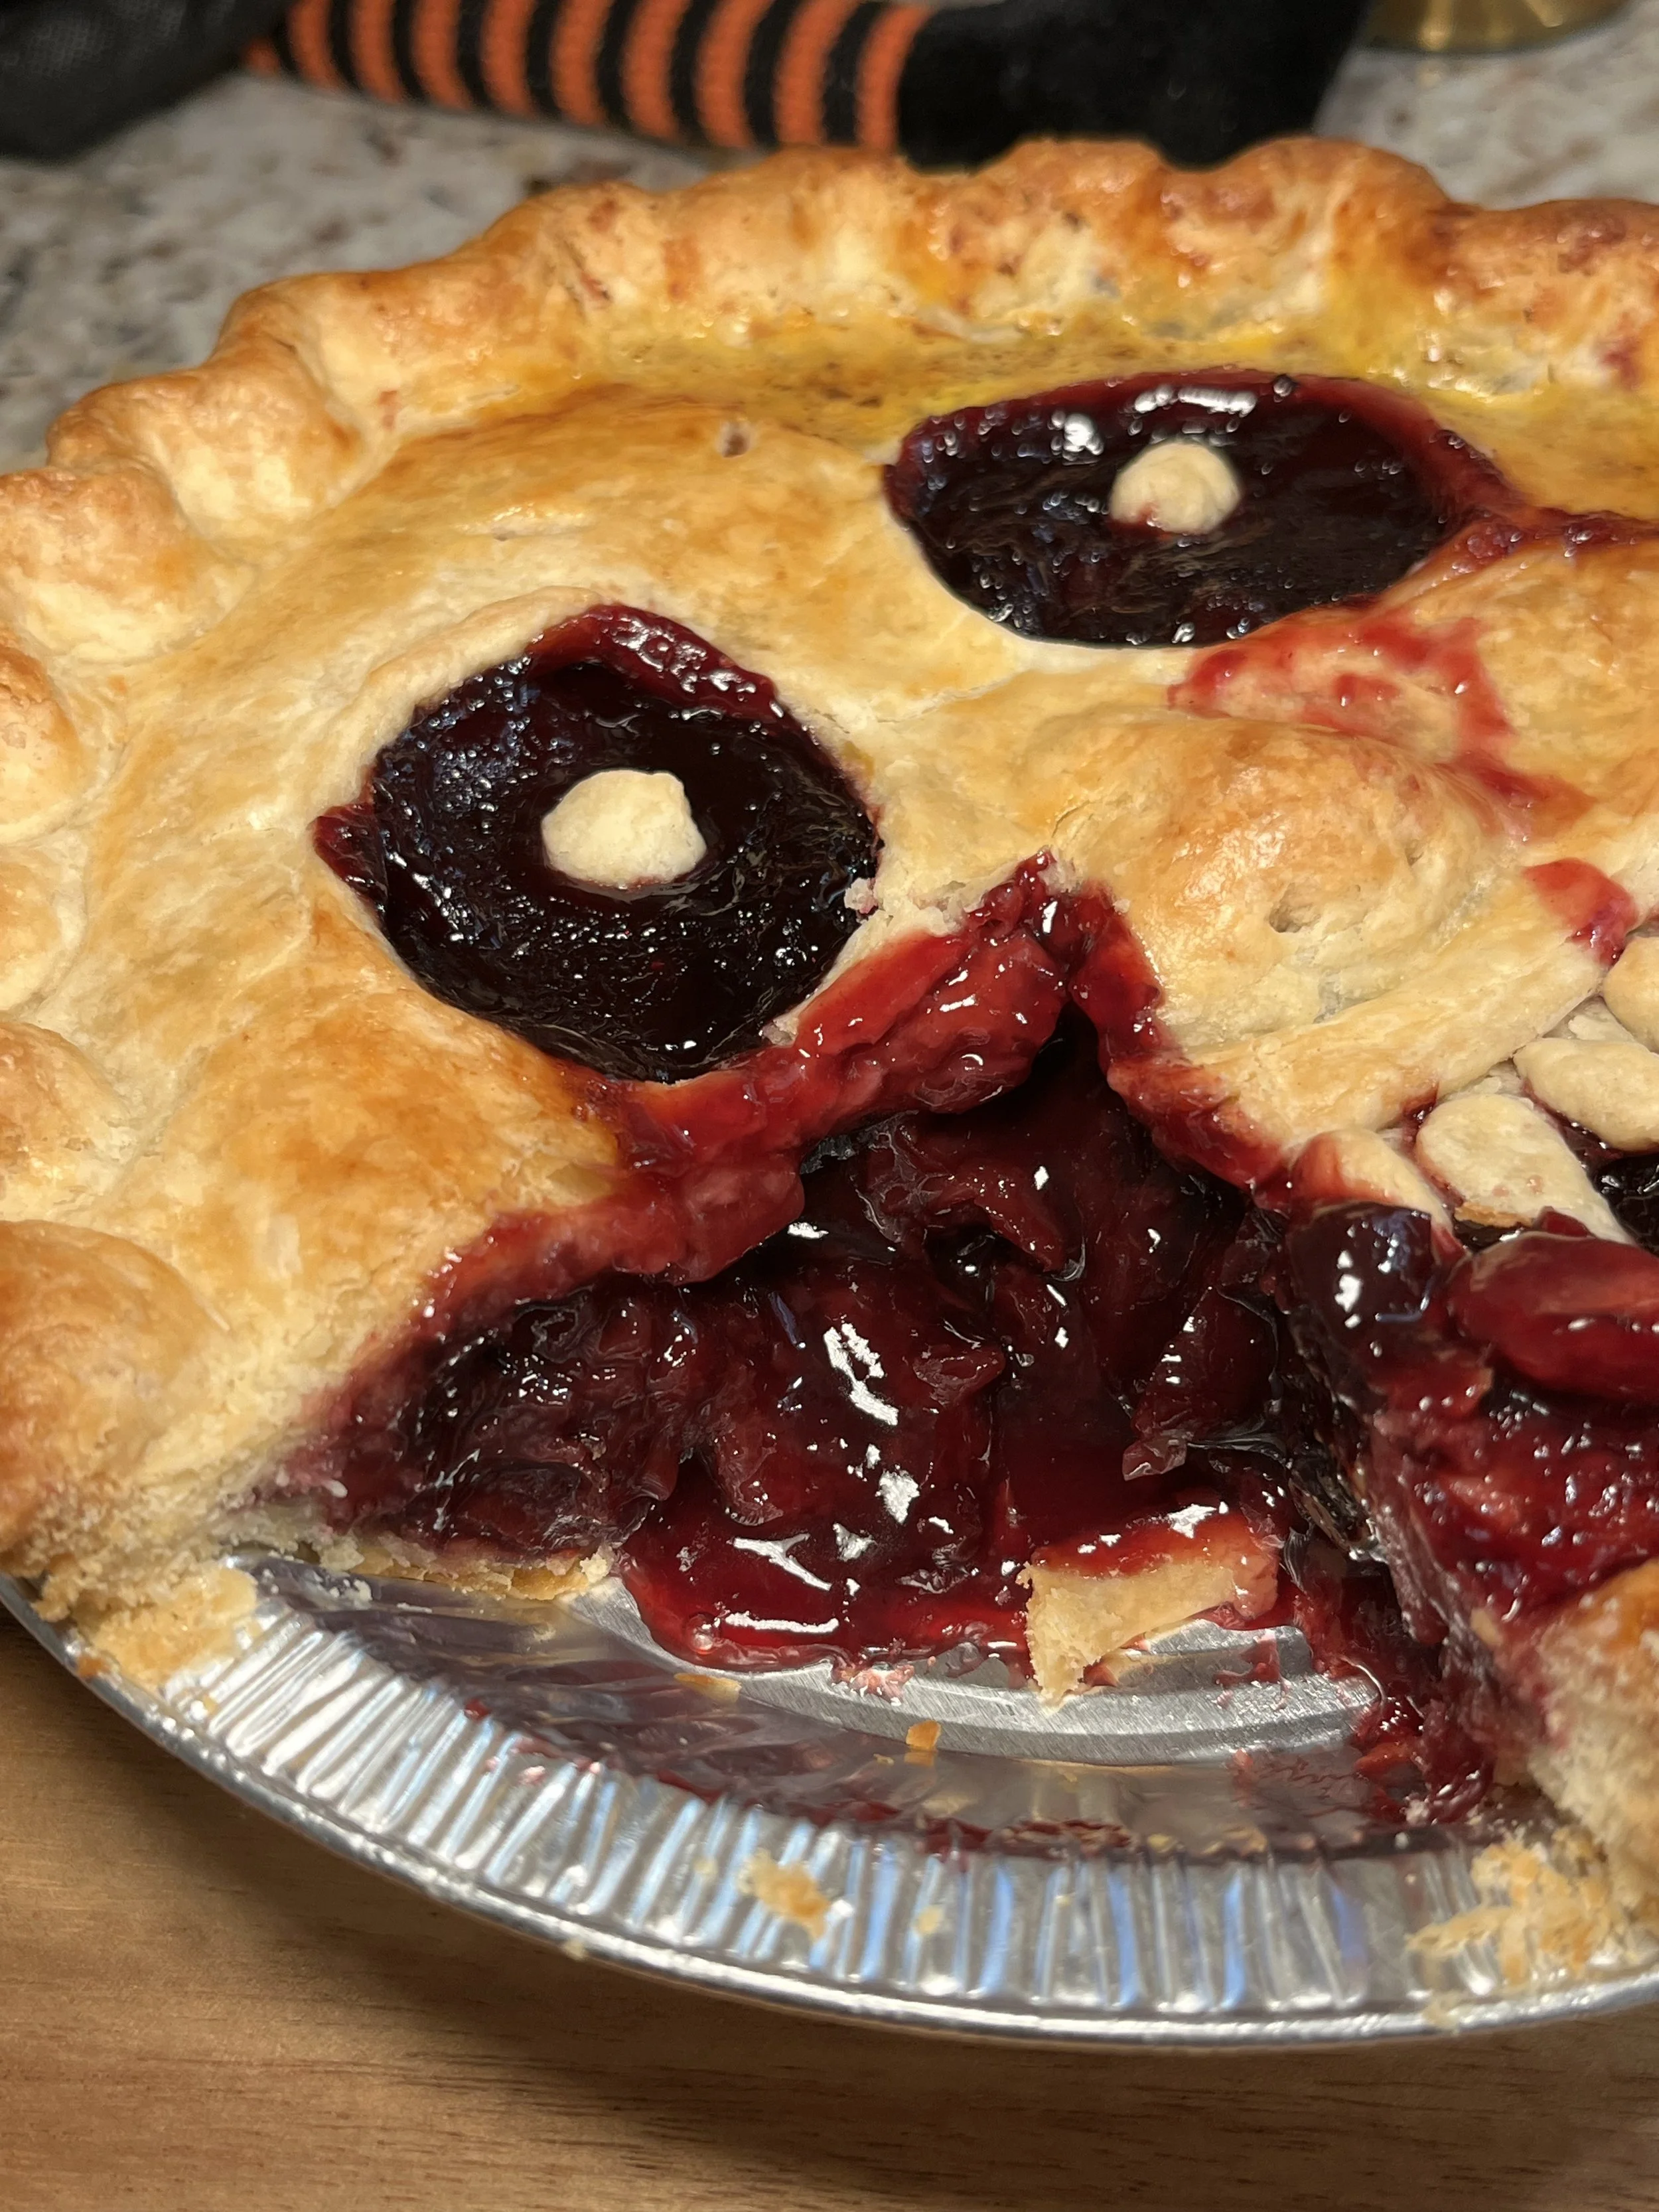
Beyond its undeniable deliciousness, cherry pie lends itself perfectly to the Halloween aesthetic. The rich, deep red filling, when glimpsed through cut-outs, can evoke a delightfully “bloody” or macabre feel – in the most delicious way possible, of course! It’s unexpected, vibrant, and a fantastic alternative to the usual pumpkin or apple fare.
The Heart of the Horror: A Delectable Cherry Filling
First, let’s talk about the star of the show: the filling.
-
Fresh or Frozen Cherries: Both work beautifully! If using fresh, pit them carefully. If using frozen, there’s no need to thaw; just adjust the cooking time slightly.
-
Sweet-Tart Balance: A good cherry pie filling strikes a perfect balance. Sugar for sweetness, a touch of lemon juice (or even almond extract for depth) to brighten the flavor, and cornstarch or tapioca to thicken it into a luscious, bubbling concoction. Don’t be shy with the cherries – a generous filling is key!
The Canvas for Creativity: Your Pie Dough
For this project, a sturdy, flaky all-butter pie dough is your best friend. You’ll need enough for a bottom crust and a top crust that you can transform into your spooky masterpiece. Make it ahead of time and chill it thoroughly – cold dough is easier to work with and less prone to shrinking.
Designing Your Ghoulish Grin: The Scary Face Crust!
This is where the magic (and the spookiness!) happens!
-
Roll it Out: Once your bottom crust is in the pie plate and filled with your cherry goodness, roll out your second disc of pie dough for the top. Make sure it’s slightly larger than your pie plate.
-
Sketch Your Scare: Lightly draw your scary face design onto parchment paper. Think classic jack-o’-lantern grins, elongated eyes, jagged teeth, or even ghost-like wails. You can also freehand directly onto the dough, but parchment helps with symmetry.
-
Cut with Care: Place your drawn design over the rolled-out dough (or freehand it) and use a sharp paring knife or a small, pointed cutter to carefully cut out the eyes, nose, and mouth. Get creative with jagged edges for teeth or swirling shapes for eyes. These cut-outs will allow the crimson cherry filling to peek through – a truly chilling effect!
-
Assemble and Crimp: Carefully transfer your scary face crust over the filled pie. Align the edges and then crimp them together with the bottom crust to seal.
-
Egg Wash for Glow: For a beautiful golden finish that highlights your design, brush the entire top crust with an egg wash (one egg beaten with a tablespoon of water or milk).
-
Bake to Perfection: Bake until the crust is golden brown and the cherry filling is bubbling menacingly through your cut-outs. Keep an eye on the edges; you might need to shield them with foil if they start browning too quickly.
Scary Cherry Pie
Created by Sue Mun
makes one, 9 inch pie
INGREDIENTS
For the Double Crust Pie Dough:
-
380g all-purpose flour
-
1 tsp salt
-
2 tbsp sugar
-
220g unsalted butter, cold and cubed
-
120g cold water
For the Cherry Pie Filling:
-
1000g frozen sweet pitted cherries
-
135 g granulated sugar
-
28 g cornstarch
-
2 Tablespoons lemon juice
-
½ tablespoon lemon zest
-
½ teaspoon salt
For the Topping:
-
Egg wash (1 egg whisked together with 1 tablespoon water)
Method
-
To make the pie dough, in a large mixing bowl, whisk together the flour, salt, and sugar.
-
Scatter the cold butter cubes over the flour mixture. Toss the cubes lightly to coat them with flour.
-
Use a pastry blender, two knives, or your fingertips to “cut” the butter into the flour. Work quickly until the mixture resembles coarse crumbs, with some pieces of butter still visible and ranging in size from small peas to tiny pebbles. These butter pieces are what create the flaky layers. Avoid overworking the dough or letting the butter melt.
-
Drizzle the cold water over the flour and butter mixture.
-
Use a rubber spatula, a wooden spoon, or your hands (use your least-warm parts, like your fingertips) to gently stir and toss the mixture until it just starts to come together. Squeeze a small handful of the mixture; if it holds together without crumbling, it’s ready. If it still crumbles, add water one teaspoon at a time, mixing lightly, until it just holds. It should still look rough and shaggy.
-
Turn the dough out onto a lightly floured surface. Gather it quickly and gently into a ball, then flatten it into a thick disc (about 1-inch thick). Do not knead—overworking develops gluten and makes the crust tough.
-
Wrap the disc tightly in plastic wrap. Refrigerate for at least 2 hours, or preferably overnight. Chilling the dough allows the gluten to relax and the butter to firm up, which prevents shrinking and ensures maximum flakiness when you roll it out.
-
Rolling out the pie dough: Remove the chilled dough from the refrigerator and let it sit at room temperature for 5−10 minutes (this makes it easier to roll). Cut the dough in half. One half will be fore the bottom curst and the other will be fore the top crust. Lightly flour your work surface and rolling pin. Roll out one half of the dough into a 12-inch circle. Carefully transfer the dough to your pie plate. Trim and crimp the edges as desired.
-
For best results, place the lined pie plate back in the freezer or refrigerator for 30 minutes before filling and baking. This final chill locks the butter and the shape in place.
-
Make the cherry pie filling: In a large pot, mix the cherries, granulated sugar, lemon juice, cornstarch, and salt until combined. Cook on low heat until the cherries defrosts, about 10 minutes.
-
Once the mixture starts bubbling, let it boil for a minute while carefully stirring until it becomes thick and glossy. Pour the hot cherry mixture into a large bowl and cool to room temperature or place in the fridge overnight before using.
-
Preheat the oven to 425ºF and place an oven rack in the lower and middle part of the oven.
-
Transfer the cooled down cherry pie filling and all of its juices into the pastry-lined pie dish.
-
Roll out the remaining pie dough on a floured working surface and use a knife to cut out a scary design for your pie. Carefully place the pie dough on top of your cherry pie. Trim the edges and crimp the edges using a fork or crimp the edges using your fingers if desired.
-
Brush the top crust with an egg wash.
-
Bake on the lowest rack for 25 minutes.
-
Lower the oven temperature to 400ºF. If the crust is browning, cover the outer edges with aluminum foil, leaving the middle of the crust exposed. Bake for another 35-40 minutes, or until the juices are bubbling.
-
Let the pie cool at room temperature for at least 6 hours to allow the pie filling to set.
-
Serve at room temperature.